- Ever After Birthday Sweater
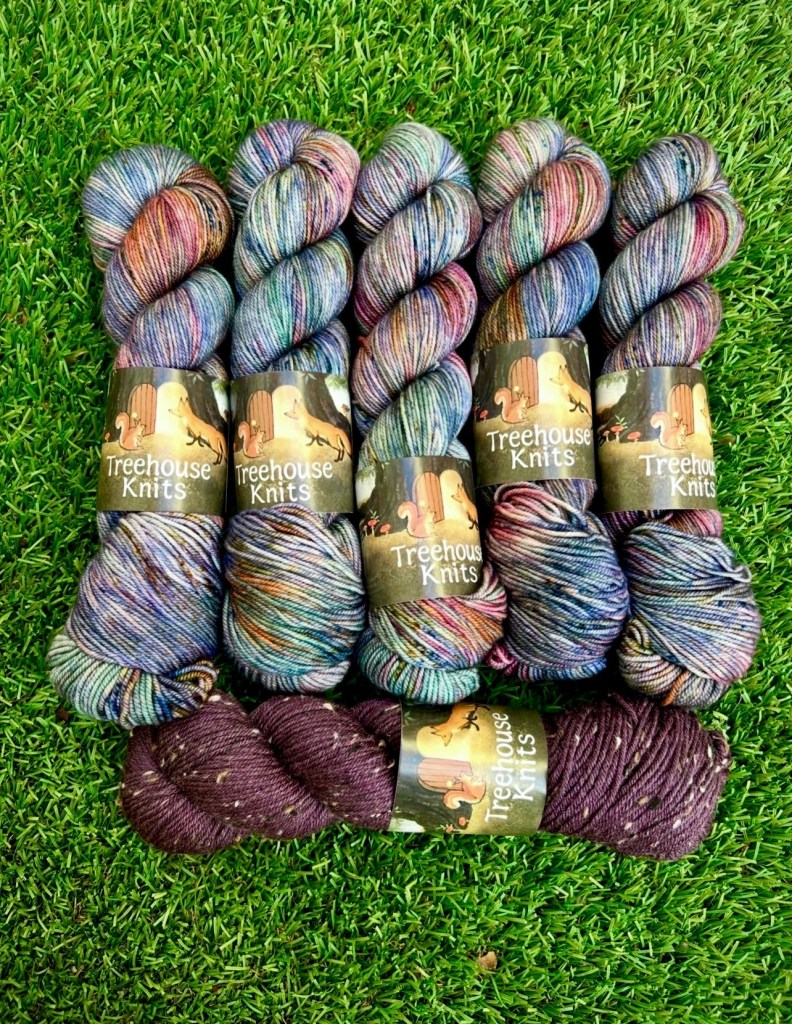
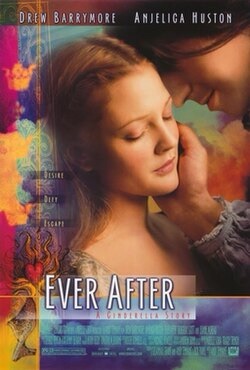
I’m less than a month away from my 40th birthday, so I decided to knit myself a sweater with my “Ever After” yarn I bought for my birthday in 2024 from Treehouse Knits (find her on Instagram here). This is one of my all-time favorite movies that I use to watch repeatedly in college while riding the city bus down to my campus. I had a knock-off “iPod” mp3 player that my dad converted a digital copy of the movie onto so I could watch it on my tiny 2 inch screen while I rode the bus for 2 hours a day, 5 days a week. Gotta love that early 2000s technology, am I right? There’s just something about the soundtrack that gets me in the feels every time I hear the main title, and I never grow tired of hearing it or watching it.
*Please note this post contains Amazon affiliate links*
Anyway, Ever After still remains to this day in my top 5 favorite movies, and as soon as I saw this yarn collection theme based on the movie releasing the same month as my birthday in 2024, I knew I just had to have a sweater quantity. I’m so glad I snagged these beautiful skeins, even if it took me almost 2 years to actually use them. And it seems only fitting that I enter the next decade of my life with not only a new sweater, but a new one using some very special yarn with a lot of sentimental value to me.
The variegated colorway is called Ever After, based on the original theatrical poster from the movie (aka the original DVD cover, which yes of course I still have my copy and a DVD player on which to watch it whenever I want for free. I still cling to my elder Millenial nostalgia, which has its perks). The tweed deep purple yarn is called Noble Blood, based on the scene at the end of the movie when the stepmother Rodmilla and Marguerite are in the laundry room near the purple dye pots and Rodmilla says that iconic line “I am of noble blood!”
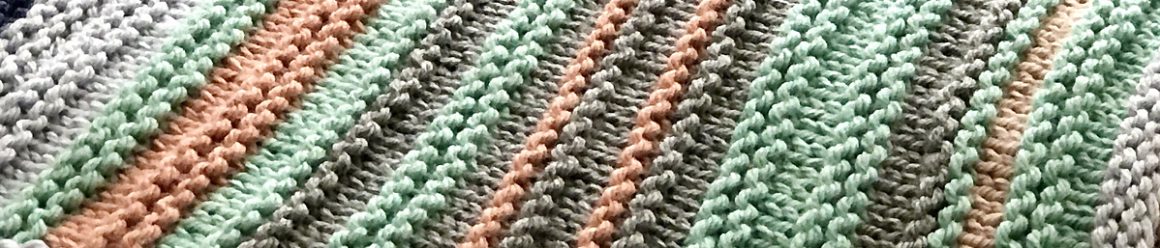
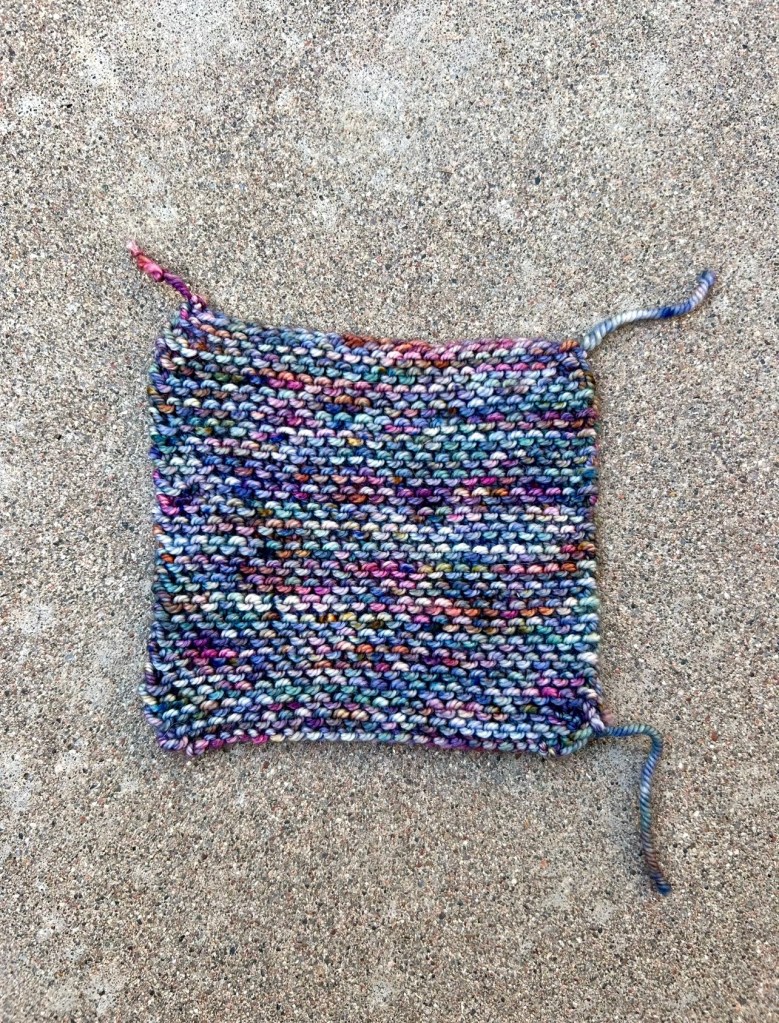
I’ll be using a *TBD cardigan pattern to make my sweater, with Ever After for the main color and Noble Blood for the contrasting ribbing sections. I’ll be alternating skeins as I knit to avoid any noticeable differences in the hand-dyed skeins as well as to prevent color-pooling, which I did for my swatch, and I am loving how this yarn is knitting up. I’m not sure if I’ll be able to get this project done in time for my actual birthday, but I do have a two week Spring Break coming up during that time, and there will be plenty of knitting time. My goal is to hopefully have the sweater finished by the end of March, and maybe just maybe the weather will allow for me to still get a few wears out of it this season before it gets too hot.
Disclosure: Please note that this post contains Amazon affiliate links. By clicking on the link and making a purchase, I receive a small commission that helps support this website and my family at no additional cost to you. Thank you for your support!
*post was updated to remove a problematic designer reference that I originally made when I chose the pattern I planned to use. I will be choosing a different pattern that is yet to be determined, but I wanted to make sure I removed the previous pattern reference in the meantime.
- Back to Blogging
It’s been far too long since I’ve written a blog post. I’ve started and stopped writing a new post multiple times in the past 3 years, and it’s partly because I was embarrassed about the noticeable gap in posts, and partly because I wasn’t sure how to jump back in. But like anything that is worth doing, sometimes you just need to start small. So this is me taking a small step to get back into writing blog posts.
There are a lot of changes that have happened in my life since I last hit “publish.” I went through a divorce and learned how to navigate the single mom life, worked at my local yarn shop for a few months, moved into a new house, went back to school and got certified as a speech therapy assistant, and started a new career working in education providing speech therapy. During this time it was necessary for me to take a step back from designing and public posting on social media, and yet I did still manage to get a design published in a book (Berry Patch Square in 60 Quick Granny Squares *Amazon affiliate link). It’s been a whirlwind to say the least, but I have missed designing patterns, and I want to get back into designing and writing again. I have also still been journaling and reading lots of books, so I would like to add some of that content onto the blog as well. I used to do reviews and journaling videos, so maybe that will come back as I ease back into a more public persona of my creative endeavors. I have managed to publish a few new designs each year, which you can check out on my Patterns page on the website or find on Ravelry.
I mostly needed time to let my crafting be a source of happiness and comfort, rather than deadlines and expectations, self-imposed or otherwise. But now I feel ready to revive some things I once loved doing as I move forward into another chapter of my life. I’ve got a milestone birthday coming up in March, and I want to start a new decade of my life returning to things I once loved doing as a way to reclaim what I abandoned or let grow stagnant. In other words, I don’t want to just survive my life anymore, I want to make intentional choices to thrive and enjoy creativity once again.
So this is me writing to say that I am still here. Still crafting and creating. Ready to write again.
- Sanders Mittens
Remember when this image went viral last year as a whole mood for what was happening in the world? Well I’ve got a pattern for that!
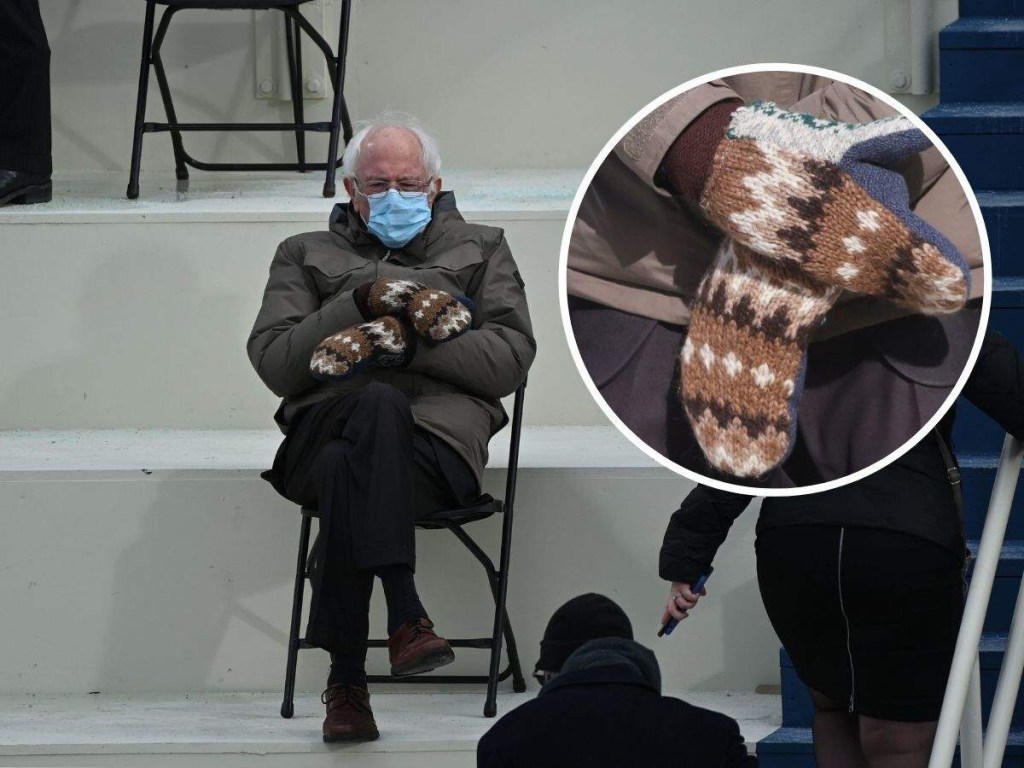
As soon as I saw this image of Bernie Sanders hunkered down in the cold with these cozy mittens, I knew it needed to be a knitting pattern. That very same day I pulled out a pencil and some graph paper to chart out a similar colorwork pattern as to the ones shown in the picture. By the end of the day, I had a Sanders Mitten and my version of the pattern was born.

I wanted to make sure my mitten pattern would be available in at least two sizes, so I picked a totally different color palette for the second pair of mittens. Of course the smaller ones would be for me, so I went with pinks and reds. What I didn’t realize is that when I substituted in the red color, little hearts appeared!

I also wanted to make sure the pattern would be beginner friendly, so the colorwork does not use more than 2 colors per row, has solid rows of knit in between each chart for a break, and no colorwork on the thumb or top decrease section. I also used a 9” circular to knit my mittens, which helped make the entire project just fly off the needles. A light blocking helps smooth everything out, and I recommend starting the second mitten right away so you won’t have second mitten syndrome, like I do a year later! I made the two sample mittens in the two colors but didn’t finish the respective mates. Now I need to find them and finish them! Thankfully my testers were able to finish a pair of mittens during testing, so the pattern is fully tested and edited.

And there you have it, the Sanders Mittens knit pattern by Jenny GL! You can find the pattern on Ravelry here and on Etsy here. Make sure to tag me @kountingsheep and use hashtags #kountingsheep and #sandersmittens on Instagram if you post your project.

- My Temperature Blanket Recipe
Please note this post contains Amazon affiliate links. See the bottom of post for full disclosure.
UPDATE: Full pattern released December 2, 2021!
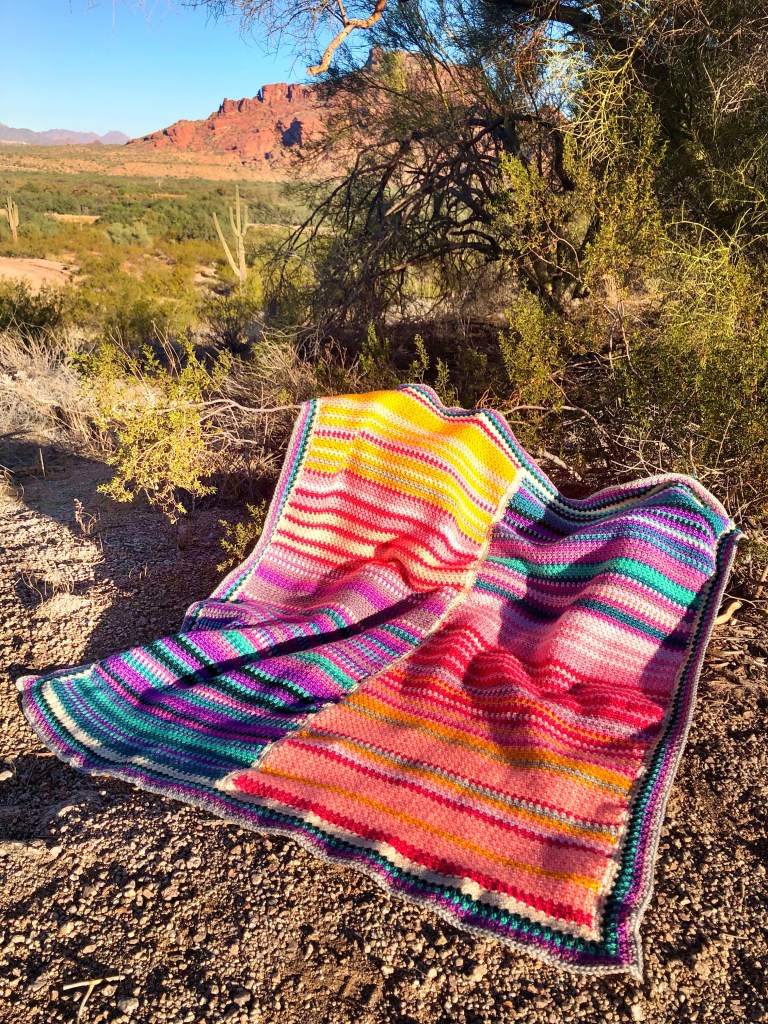
I have been getting a lot of interest on my half-finished Temperature Blanket from 2020 (I promise to finish it this year, wink wink). So I thought I would answer all the questions and give my basic recipe for how I am making one. When I finish my blanket, I will update this post with a link to the full pattern in my shop, but this will definitely get you started! I’m going to walk you through my process for picking colors, creating a temperature range, and helpful tips for making your own Temperature Blanket.
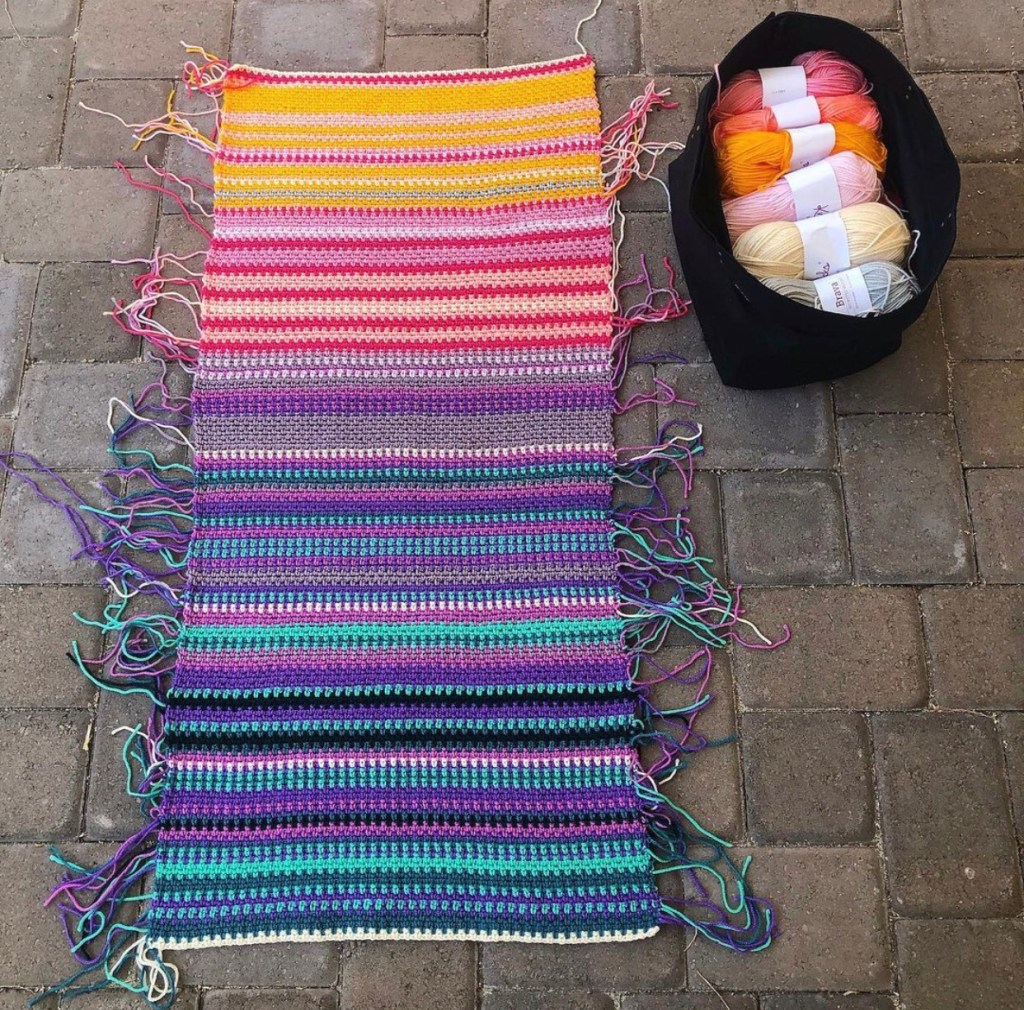
One of the biggest factors to a successful Temperature Blanket is to pick colors you like. It does not have to be rainbow colors. However, make sure to choose a yarn that won’t be discontinued any time soon and comes in a wide range of colors. For my first blanket, I picked Knit Picks/We Crochet Brava Worsted yarn. It’s an affordable yarn that I’ve used before and enjoy working with, plus it comes in so many different colors. You’ll want to pick about 10 or more different colors, depending on the temperature range you want to create. Obviously the more colors you have, the more colorful and nuanced your blanket will be. Also make sure to add in a neutral color, like cream, gray, or black, to use as a Monthly Marker.
The next thing you want to do is decide whether you want to record the high temps or the low temps for each day. For my blanket, I choose to focus on the high temps. It’s also important to create your own temperature range based on your local area, since some places don’t range in temperature as much as other places, or your temps may be more extreme (hot or cold) than other parts of the world. For example, I live in Arizona where it doesn’t really get below 50 degrees Fahrenheit for the high during the winter and the summer can be as high as 120 degrees Fahrenheit!
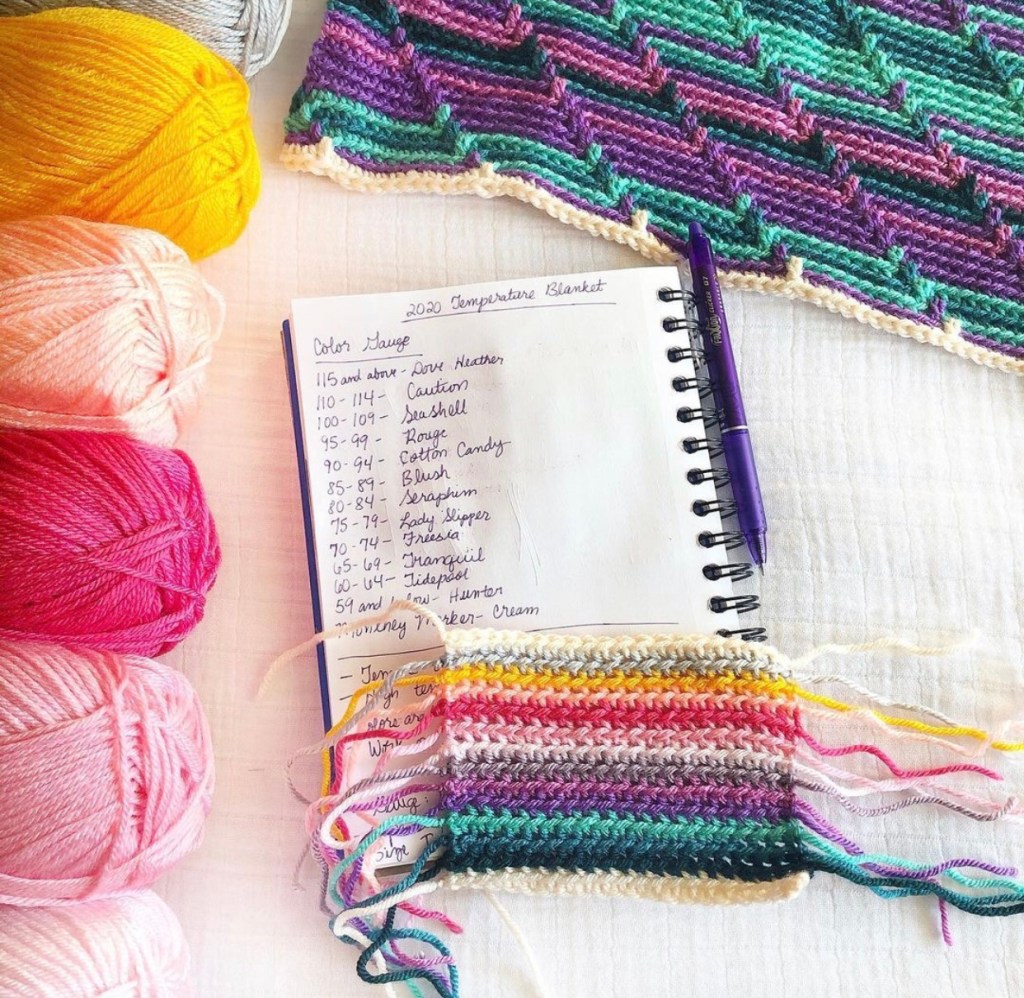
Make a list of the colors you have and then divide up your temperature range amongst the colors. For my range, I did a 5 degree gap, since I wanted to make sure my blanket had a lot of colorful nuance. Here’s my Temperature range as an example:
Mesa, Arizona Temperature Range
- 115 and Above: Dove Heather
- 110-114: Caution
- 105-109: Seashell
- 100-104: Rouge
- 95-99: Cotton Candy
- 90-94: Blush
- 85-89: Seraphim
- 80-84: Lady Slipper
- 75-79: Freesia
- 70-74: Tranquil
- 60-69: Tidepool
- 59 and Below: Hunter
- Monthly Marker: Cream
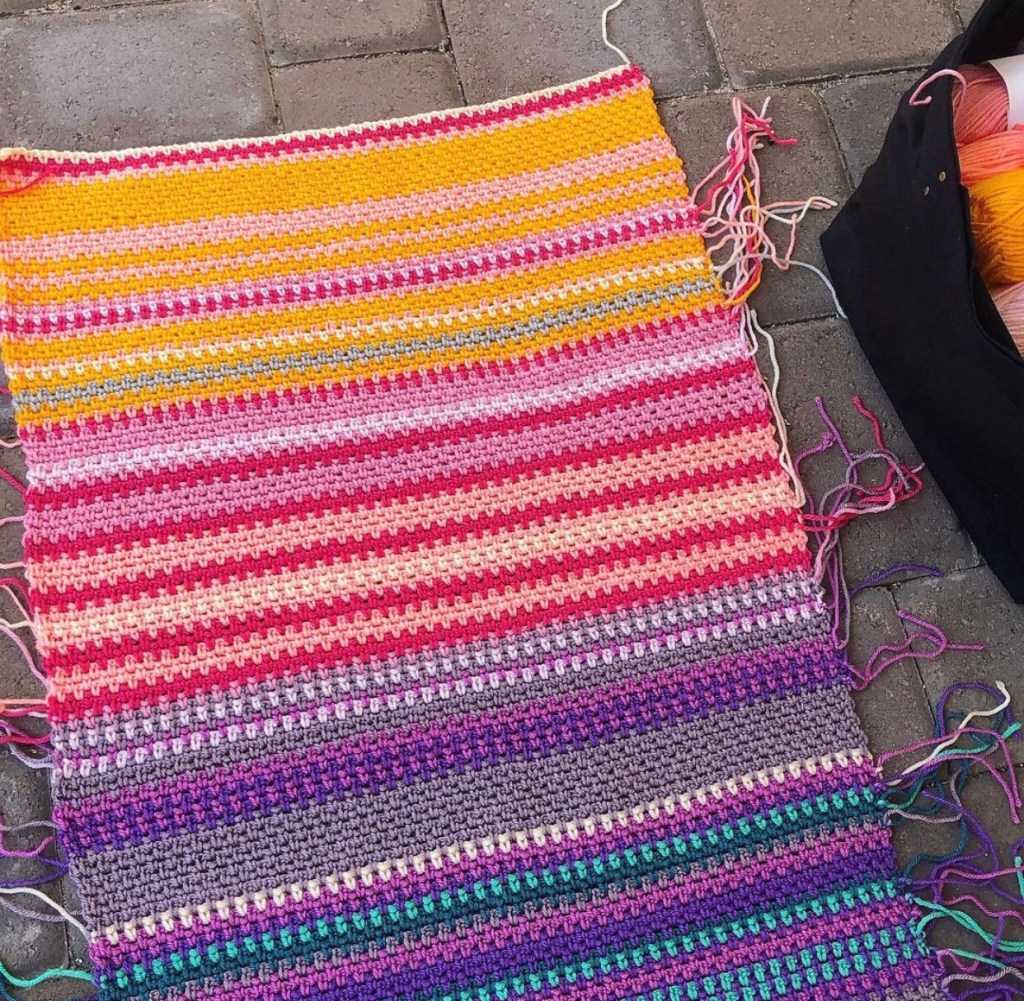
Another important factor to a successful temperature blanket is to not make it in one big row-a-day block, because 365+ rows makes for a way too long blanket. It’s better to break it down into panels or squares so that your blanket will come out to a more manageable size. This also means less work each day/week since you’re only working on a portion of the blanket at a time. For mine, I decided to do two panels. It works out almost exactly even to split it into the first half of the year and the second half of the year, including a starting row and the 12 monthly markers.

The great thing about modern technology is that you can always access temperatures online. This is helpful for working on your blanket once a week or once a month, instead of trying to keep up daily if you’re like me and can’t commit to a daily year-long project. It also makes it easier to catch up should you fall behind, since you can always look up and record your temperatures for past dates. It also means you don’t necessarily have to do a temperature blanket for your current year! Pick a special year (like the year you were born or your child was born or you got married, etc) to help commemorate a milestone year you want to remember. I did go ahead and write down the daily temps in my notebook (or you can use a knitting project notebook like this) so I could cross them off as I worked that row and keep track of where I was for when I inevitably abandoned the project and came back to it.
You’ve got your yarn, you’ve got your temp range, now it’s time to get started! I chose the crochet moss stitch for my blanket, and that will be the pattern I share below. I highly recommend making a gauge swatch with all of your colors in order, so you can see how they will work together, as well as to measure your gauge. Gauge is not essential for this project, but it’s helpful to know you won’t get a blanket that’s too big or too small. Get the full pattern including Temperature Tracking Chart on Ravelry here and on Etsy here.
My Temperature Blanket (Crochet) Details
- Finished Size: Panel – 18”/46 cm wide by 44”/112 cm long; Blanket – 40”/102 cm wide by 48”/122 cm long
- Gauge: 16 sc and 16 rows = 4”/10 cm. Use a gauge tool like this to check your gauge swatch.
- Hook: US Size H (5 mm) Clover Amour hook
- Notions: Chibi yarn needle, scissors, tape measure
- Yarn: Knit Picks/We Crochet Brava Worsted (100% acrylic; 218 yards/100 grams per skein) in 13 colors: 1-2 skeins in each color. See above for example colors. You could also get a couple sampler packs of Brava Worsted where all the colors are picked for you.
Use hashtag #mytemperatureblanket and #kountingsheep when sharing your progress on social media! You can also tag me @kountingsheep on Instagram for a chance to be shared in my Stories. Link your project on Ravelry here.
Please note this post contains Amazon affiliate links. This means that when you make a purchase through the link, I receive a small commission at no additional cost to you. All pictures and opinions contained in this post are my own.
- Change Your Mind Shawl & More
I keep forgetting that I’m trying to revive my blog and post more regularly. But this pandemic has been a whirlwind the last few months, and I took a designing break to give myself permission to just craft for myself. I also took a detour back into sewing, and I’ve been selling and donating cloth face masks. You can shop for them in my Etsy store here.

I did break my designing hiatus to release the Change You Mind Shawl pattern and help raise funds to donate to a charity doing the work to fight police brutality in America. 50% of pattern sales through June 30th will be donated to Campaign Zero. If you are interested in learning more about doing the work of dismantling racism in your own life, a good place to start is with these books on Amazon (affiliate links): Me and White Supremacy or How to Be Antiracist. Here is also a helpful list of ways to actively put your words into actions.

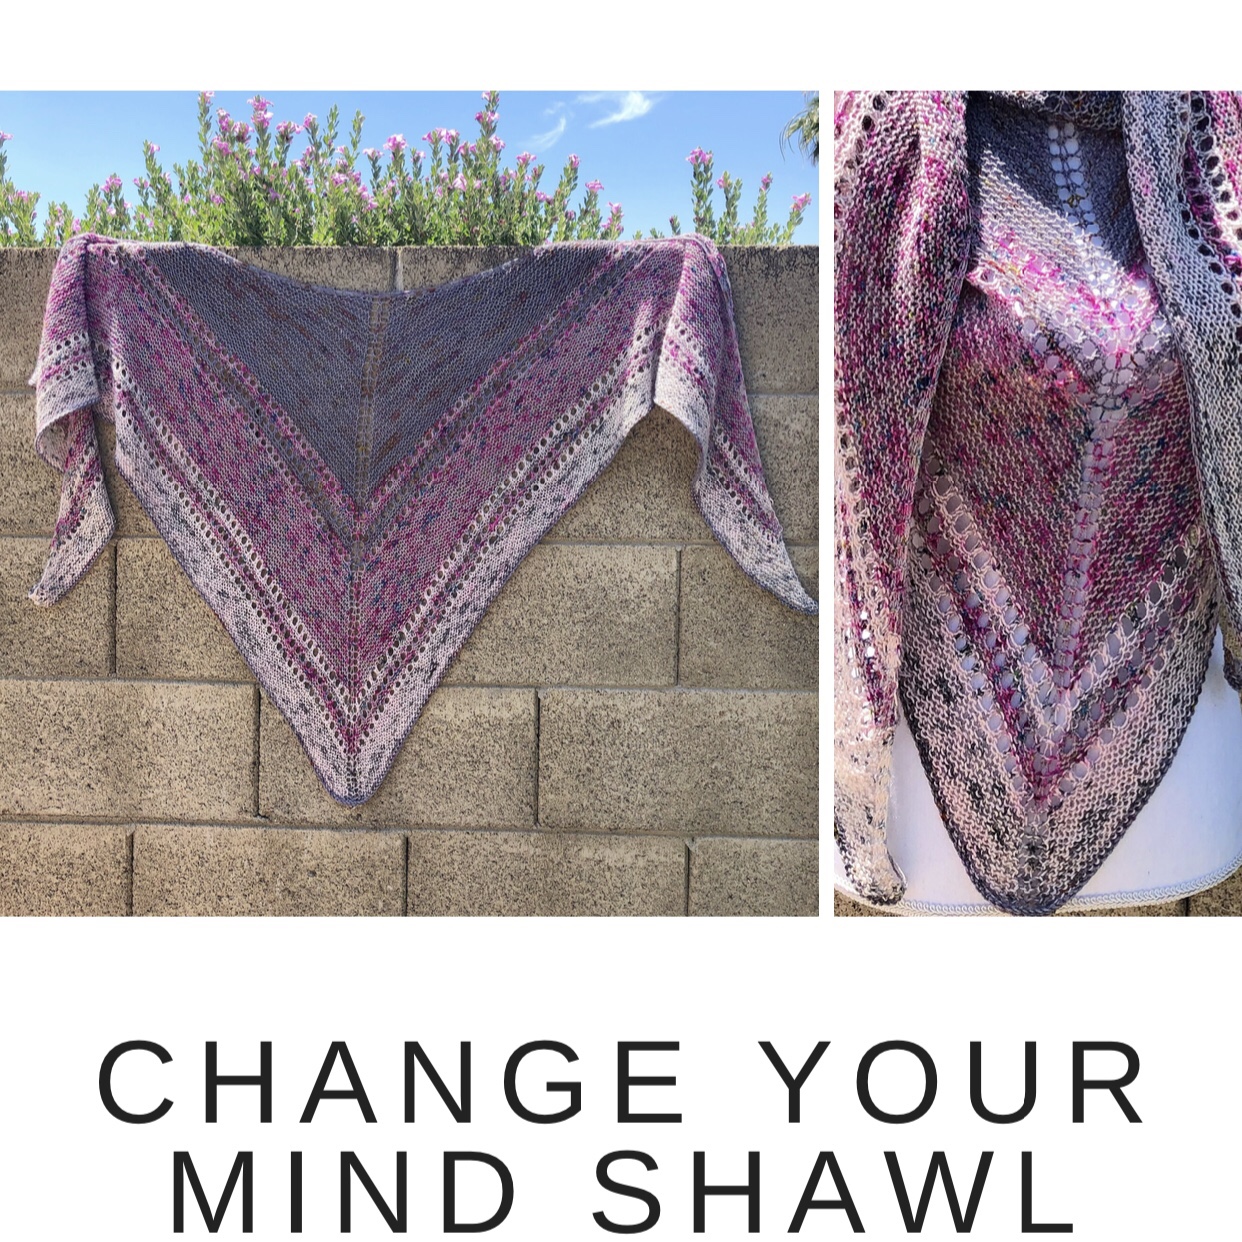
Change Your Mind Shawl was born out of a happy accident because I couldn’t decide on what pattern to create or colors to use. Sometimes momentary indecision can lead to a creative breakthrough. Instead of ripping out my work, I just kept going. It’s rare when I don’t plan out a design beforehand, so it was fun to let the creating happen as I knit. The simple garter stitch makes for a soothing project while the eyelets and color changes add just the right pop of fun.

Change Your Mind Shawl is an elongated triangle shawl that uses 3 colors of fingering weight that fade from dark to light. The fading sections use rows of eyelets to create both a lace pattern and a shift in colors. This shawl is a great way to use 3 special fingering weight yarns from your stash. And if you change your mind about the colors, you can always make another one! Grab your copy of the pattern on Etsy here.
Please note this post contains Amazon affiliate links. This means that I receive a small commission when you shop through the link at no additional cost to you. All opinions and pictures in this post are my own.

